Adding FlashPCB Libraries in KiCad
Step-by-step guide to getting the FlashPCB Libraries in KiCad
Update July 26, 2024: We have temporarily removed our KiCad library.
Earlier this year we wrote a blog post detailing how to add external component libraries to AutoDesk EAGLE in order to use FlashPCB libraries; since we have expanded our capabilities to support KiCad we will share the process to import the new libraries to a local KiCad program.
KiCad vs Eagle libraries
Unlike AutoDesk EAGLE, where a library file contains footprints, symbols, and devicesets, KiCad libraries are broken up into separate footprint and symbol libraries. We shall provide the steps to add both.
Using FlashPCB's GitHub Repository
The first step to importing FlashPCB’s KiCad library is to clone the github repository, which will entail the same process as was done for EAGLE libraries. After the FlashPCB KiCad libraries are on the local machine they will be associated with the local KiCad instance so that they may be used for designing new PCB schematics and board layouts. We are constantly updating our library to add new components. Cloning the repository allows you to pull the changes anytime you want to get the latest version of the library.
Step by Step Instructions
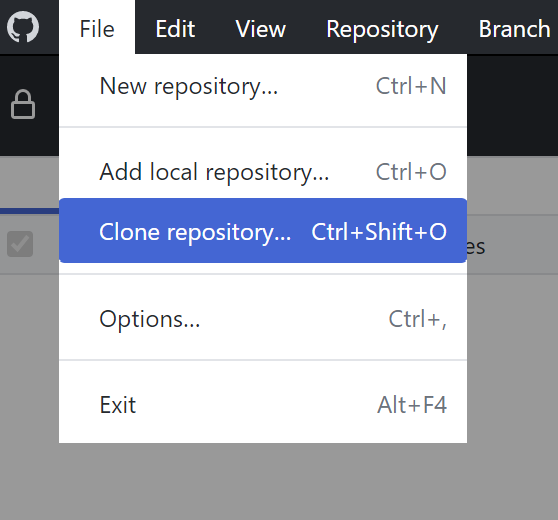
I. Clone FlashPCB Repository
- Download and install GitHub’s desktop application from https://desktop.github.com/
- Open the Clone Repository Menu. File --> Clone Repository
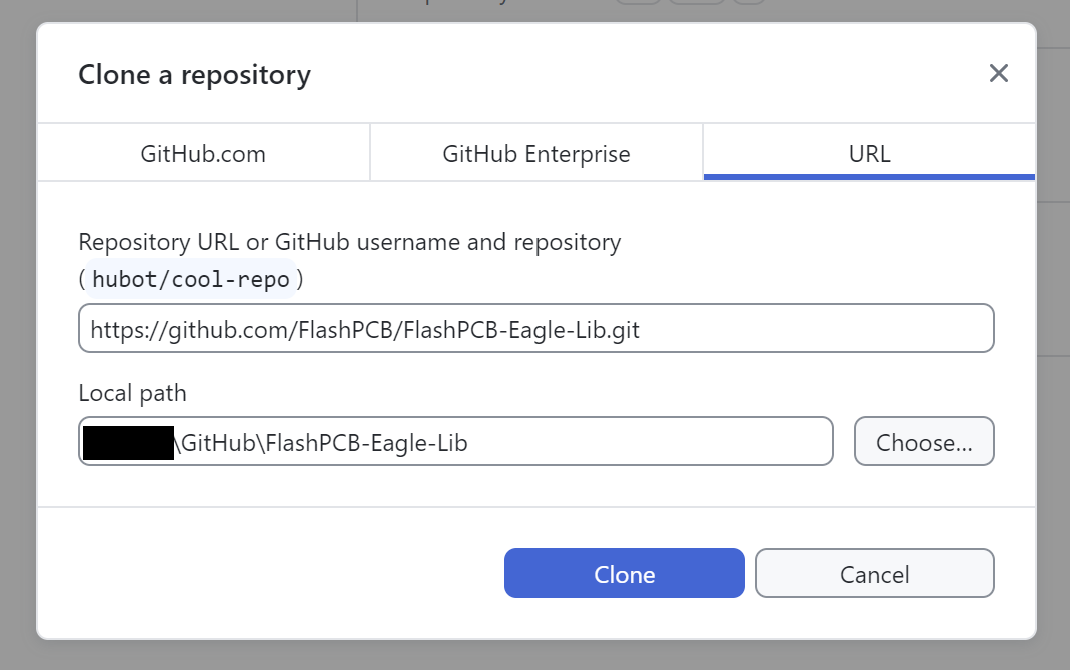
- Navigate to URL tab and Paste our repo into URL: https://github.com/FlashPCB/FlashPCB-KiCad-Lib.git
- Copy folder location from Local Path
- Click Clone
II. Adding Symbol Libraries
-
Open KiCad, if you are installing for the first time it is recommended to use Version 7.0 or higher as that will work optimally with our upload system.
-
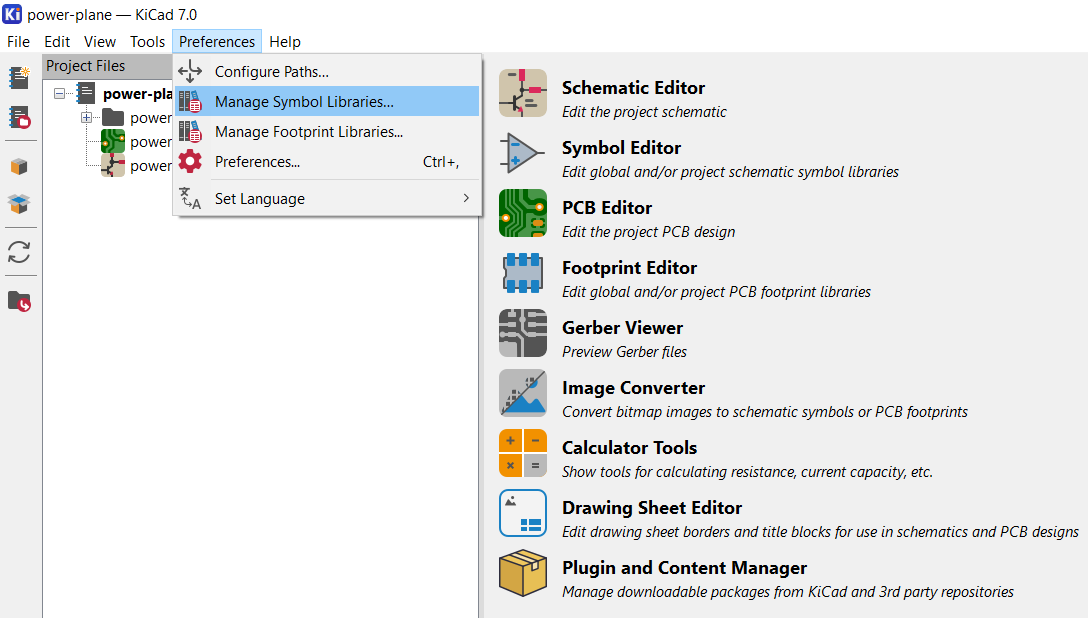
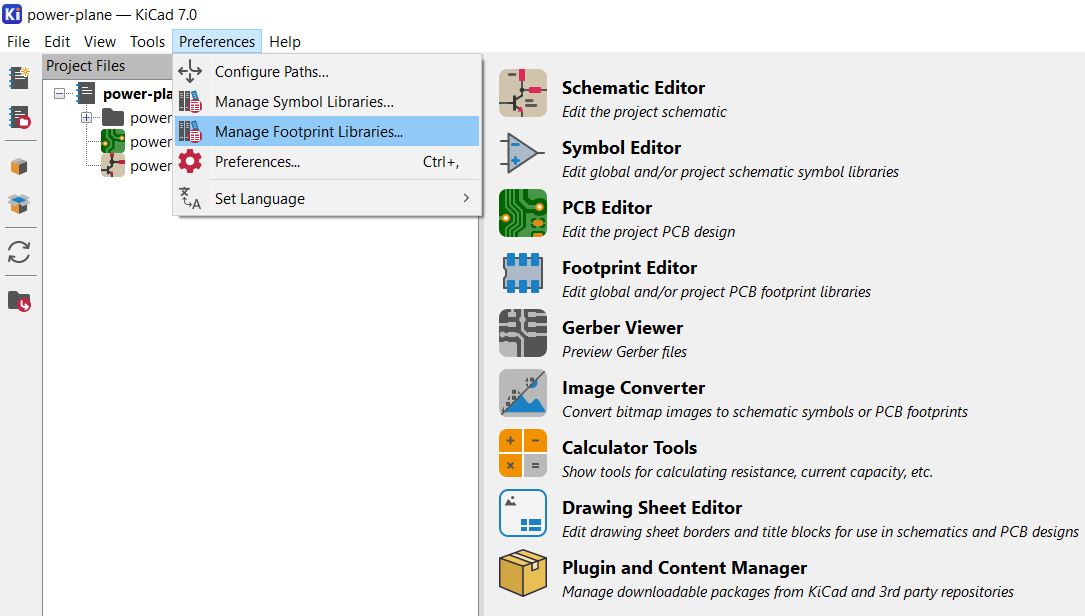
Since KiCad Libraries are separated by Symbol and Footprint, first we will associate a Symbol Library. On your KiCad instance hover over “Preferences” and navigate to “Manage Symbol Libraries”.
-
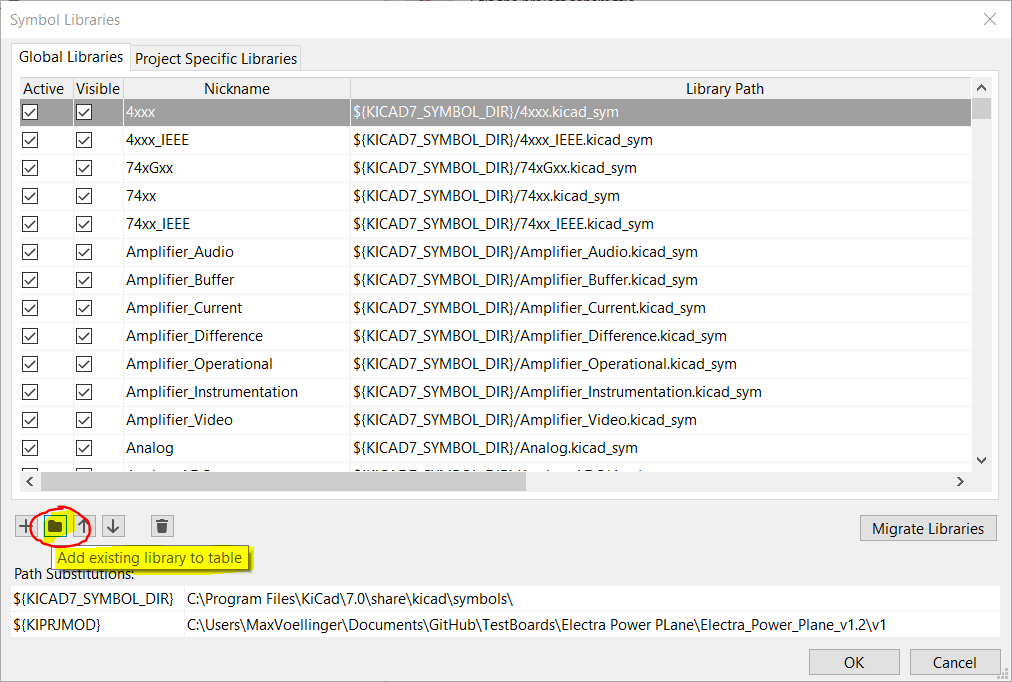
A new “Symbol Libraries” window will appear showing all existing Global or Project Specific Libraries. Navigate to the folder icon, and select “Add existing library to table”
-
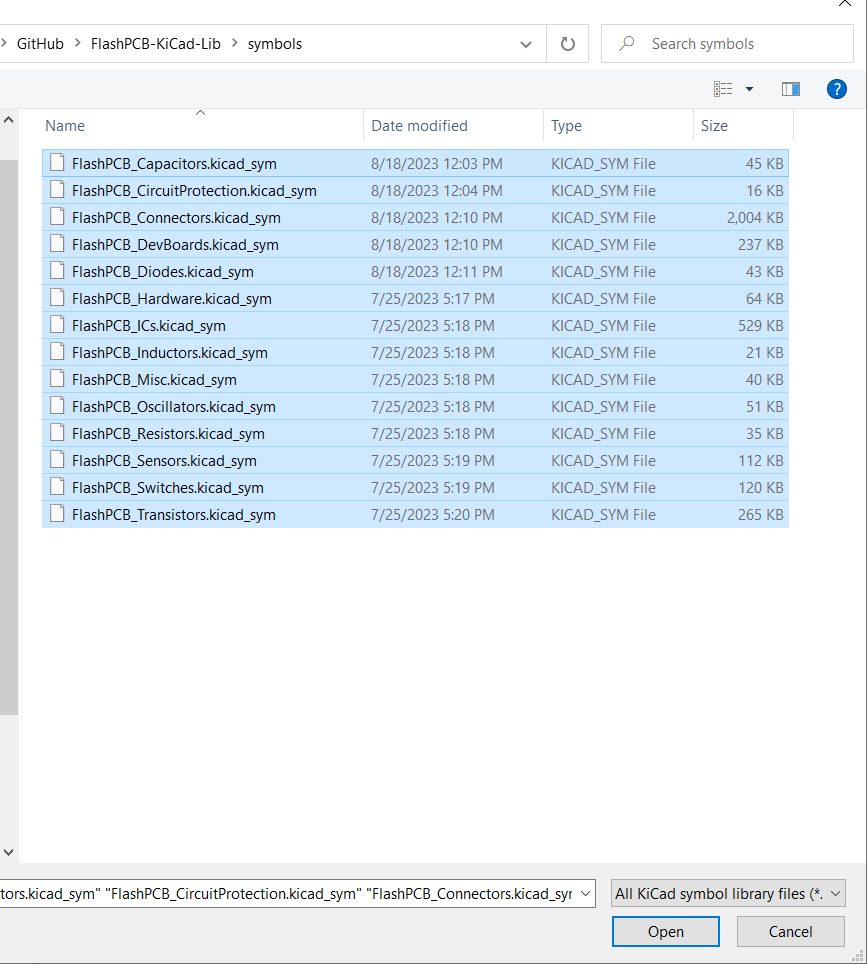
In order to add an existing library to KiCad Symbol Libraries the library files must be located in file explorer. The FlashPCB KiCad libraries will be located within the GitHub folder at this location “\GitHub\FlashPCB-KiCad-Lib\symbols”. Select all appropriate Library files, they will be file type .KICAD_SYM.
-
Select the desired libraries and click “Open”, this will close the file explorer window. Then click “OK” within the Symbol Libraries window. The selected libraries will now be accessible within the Symbol Editor.
III. Adding Footprint Libraries
-
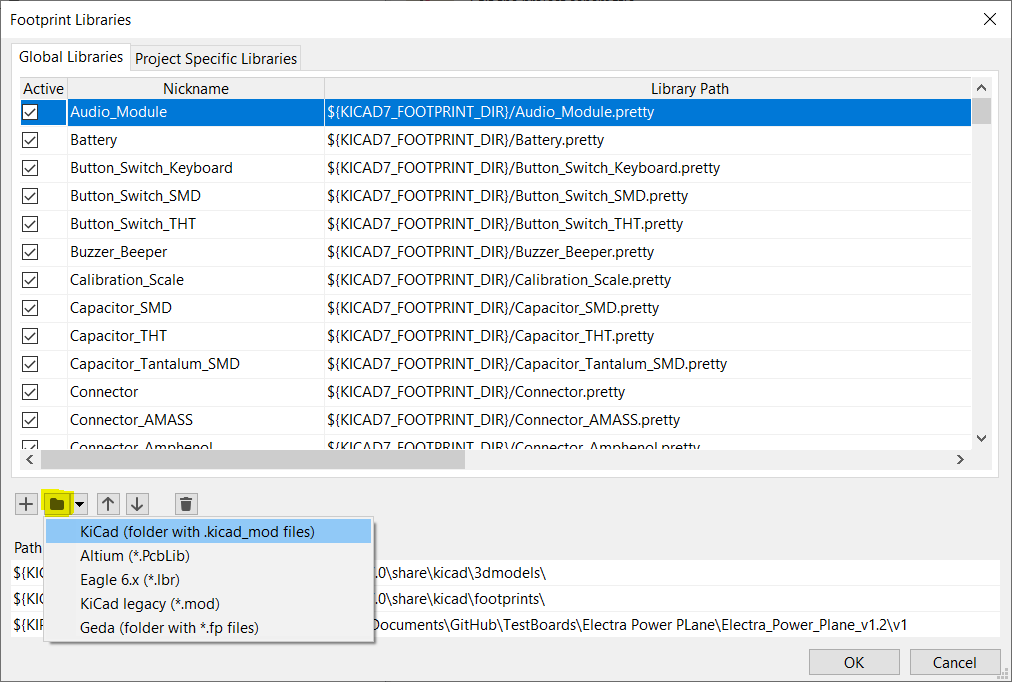
Now that the Symbol Libraries are associated with KiCad, the Footprints Library must be added. This process is very similar to adding the Symbol Libraries. Navigate to Preferences->Mange Footprint Libraries
-
Within Footprint Libraries window, navigate towards the folder icon dropdown and select option “KiCad (folder with .kicad_mod files)”
-
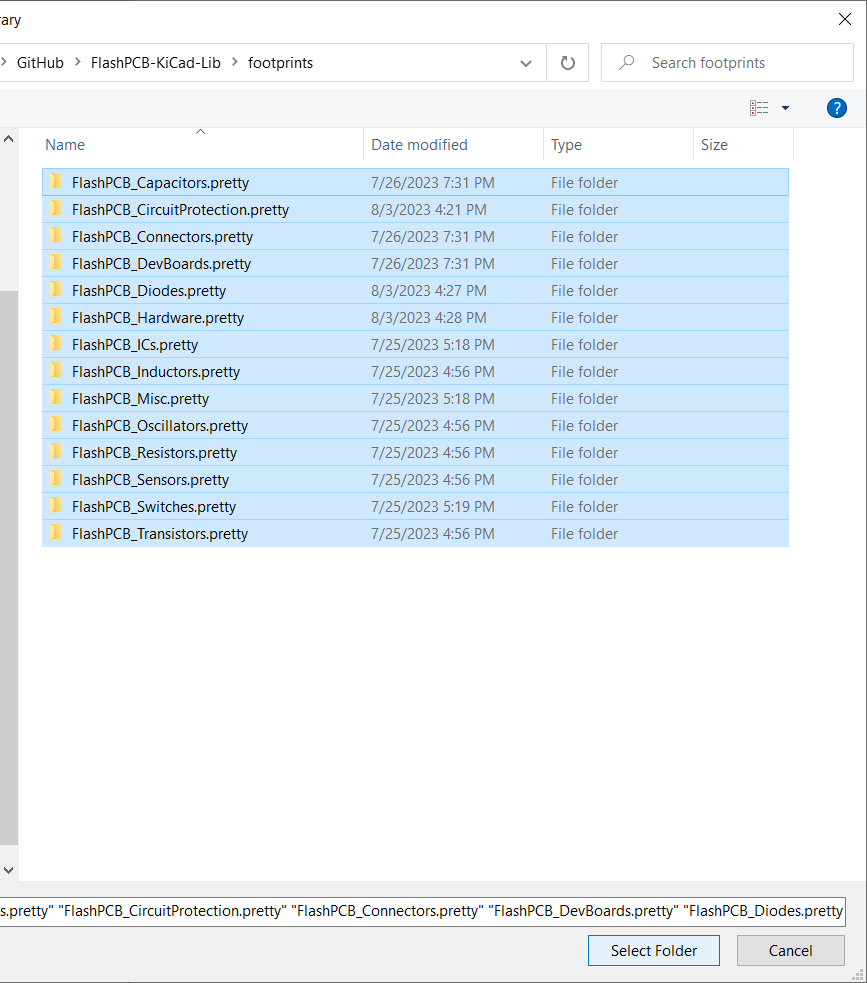
If the GitHub repo was successfully cloned, then the KiCad footprint libraries will be in the location “\GitHub\FlashPCB-KiCad-Lib\footprints”. Select the folders which end with “.pretty” and click “Select Folder” to confirm the selection.
-
The selected Footprints and Symbols will now be accessible in KiCad for use with the Schematic and PCB Editor tools!