Adding FlashPCB Libraries in EAGLE
Step-by-step guide to getting the FlashPCB Libraries in Eagle
Blog
by Tom Castner Philadelphia, PA
 While there are many ways to add libraries to Autodesk’s Eagle, we will share with you what we think is the best way to add our libraries. First we need to download the FlashPCB Eagle Library on to your computer, then we will need to update some settings in Eagle to allow it to find the library we just downloaded.
We think the best way to access FlashPCB’s Eagle libraries is by cloning our GitHub repository. We are constantly updating our library to add new components. Cloning the repository allows you to pull the changes anytime you want to get the latest version of the library.
Step by Step Instructions
- Download and install GitHub’s desktop application from https://desktop.github.com/.
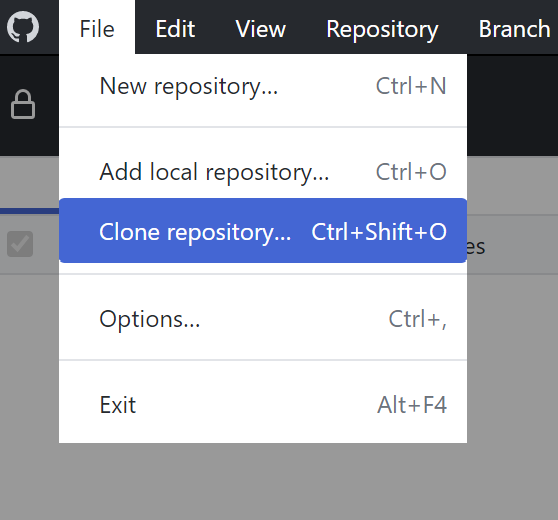
- Open the Clone Repository Menu. File --> Clone Repository
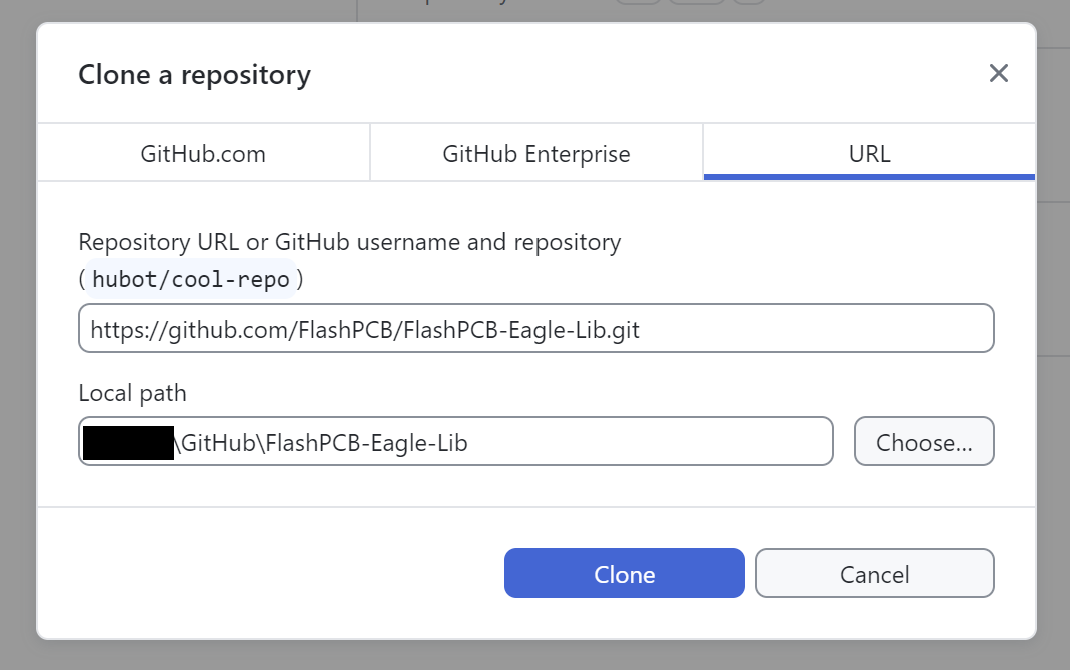
- Navigate to URL tab and Paste our repo into URL: https://github.com/FlashPCB/FlashPCB-Eagle-Lib.git
- Copy folder location from Local Path
- Click Clone
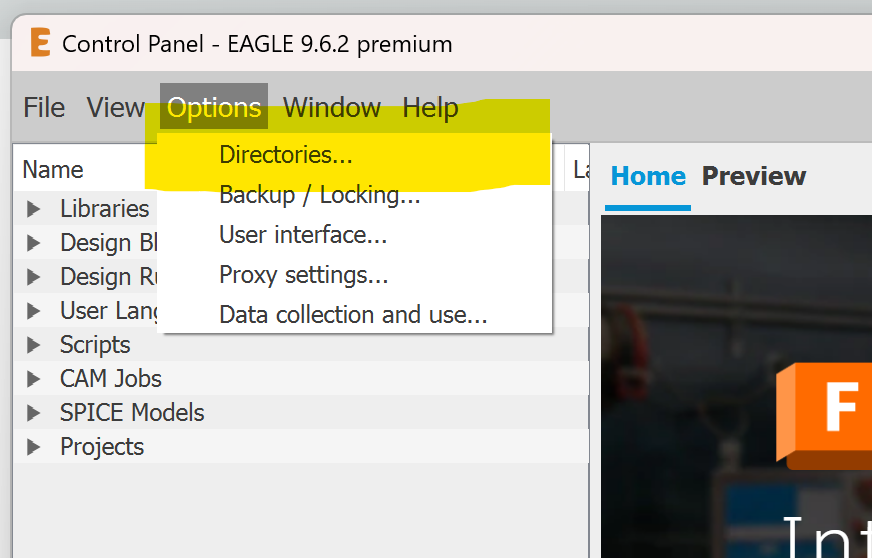
- Open Eagle’s Control Panel
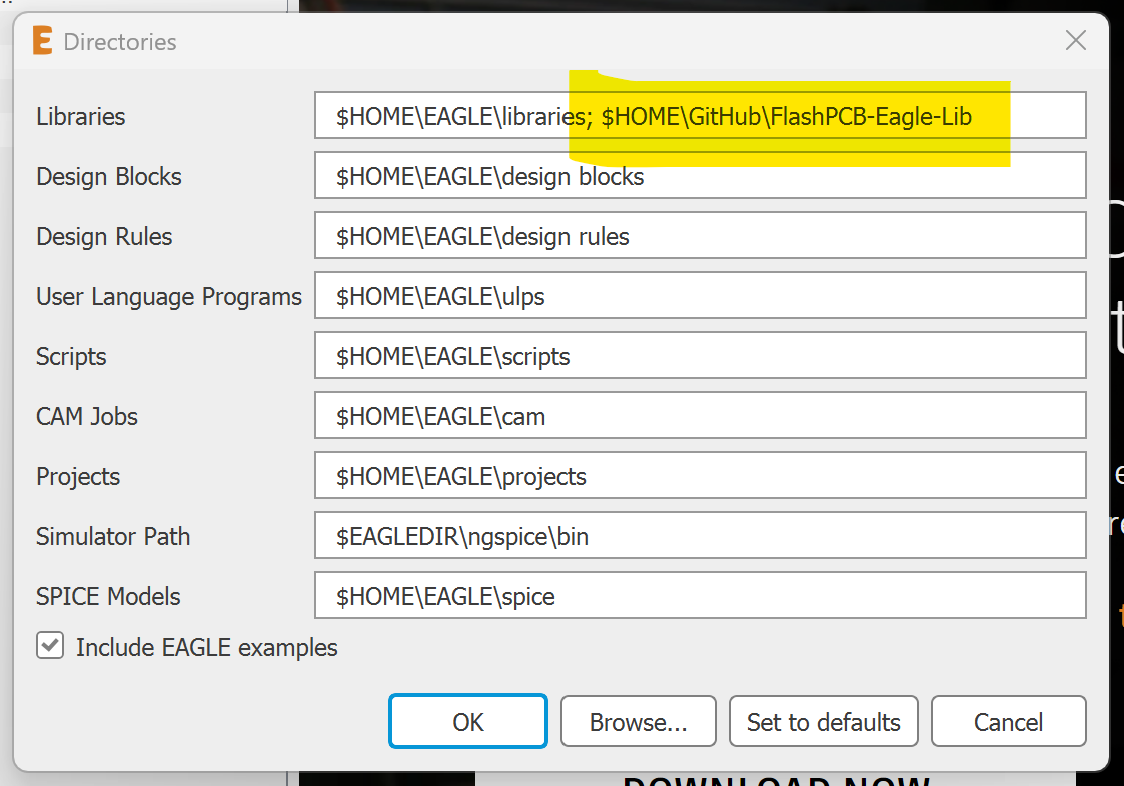
- Open Directories. Option --> Directories
- Append the Path copied from local directories to the library entry using a semicolon or navigate to the directory containing the library by putting your cursor in the Libraries field and then clicking Browse.
- Open a new schematic file.
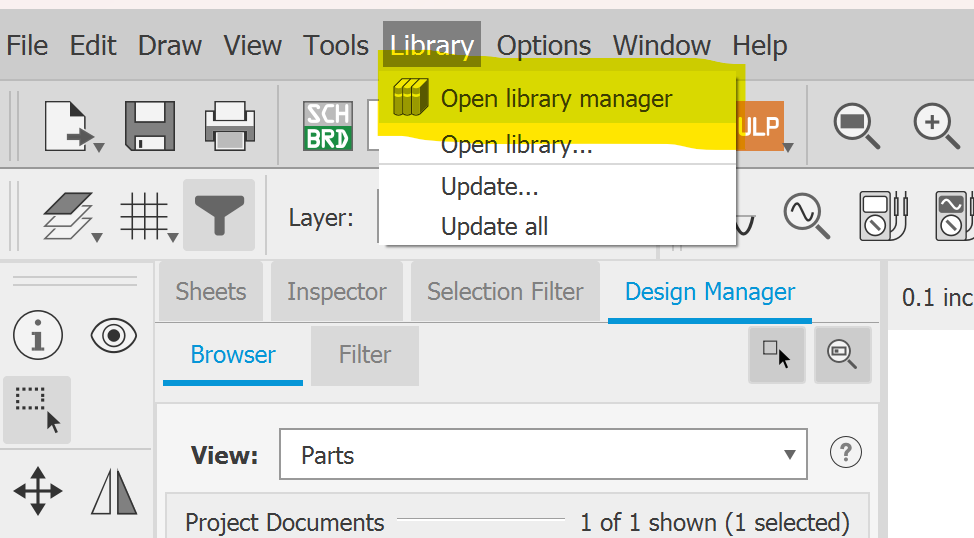
- Go to the Library Manger. Library --> Open Library Manager
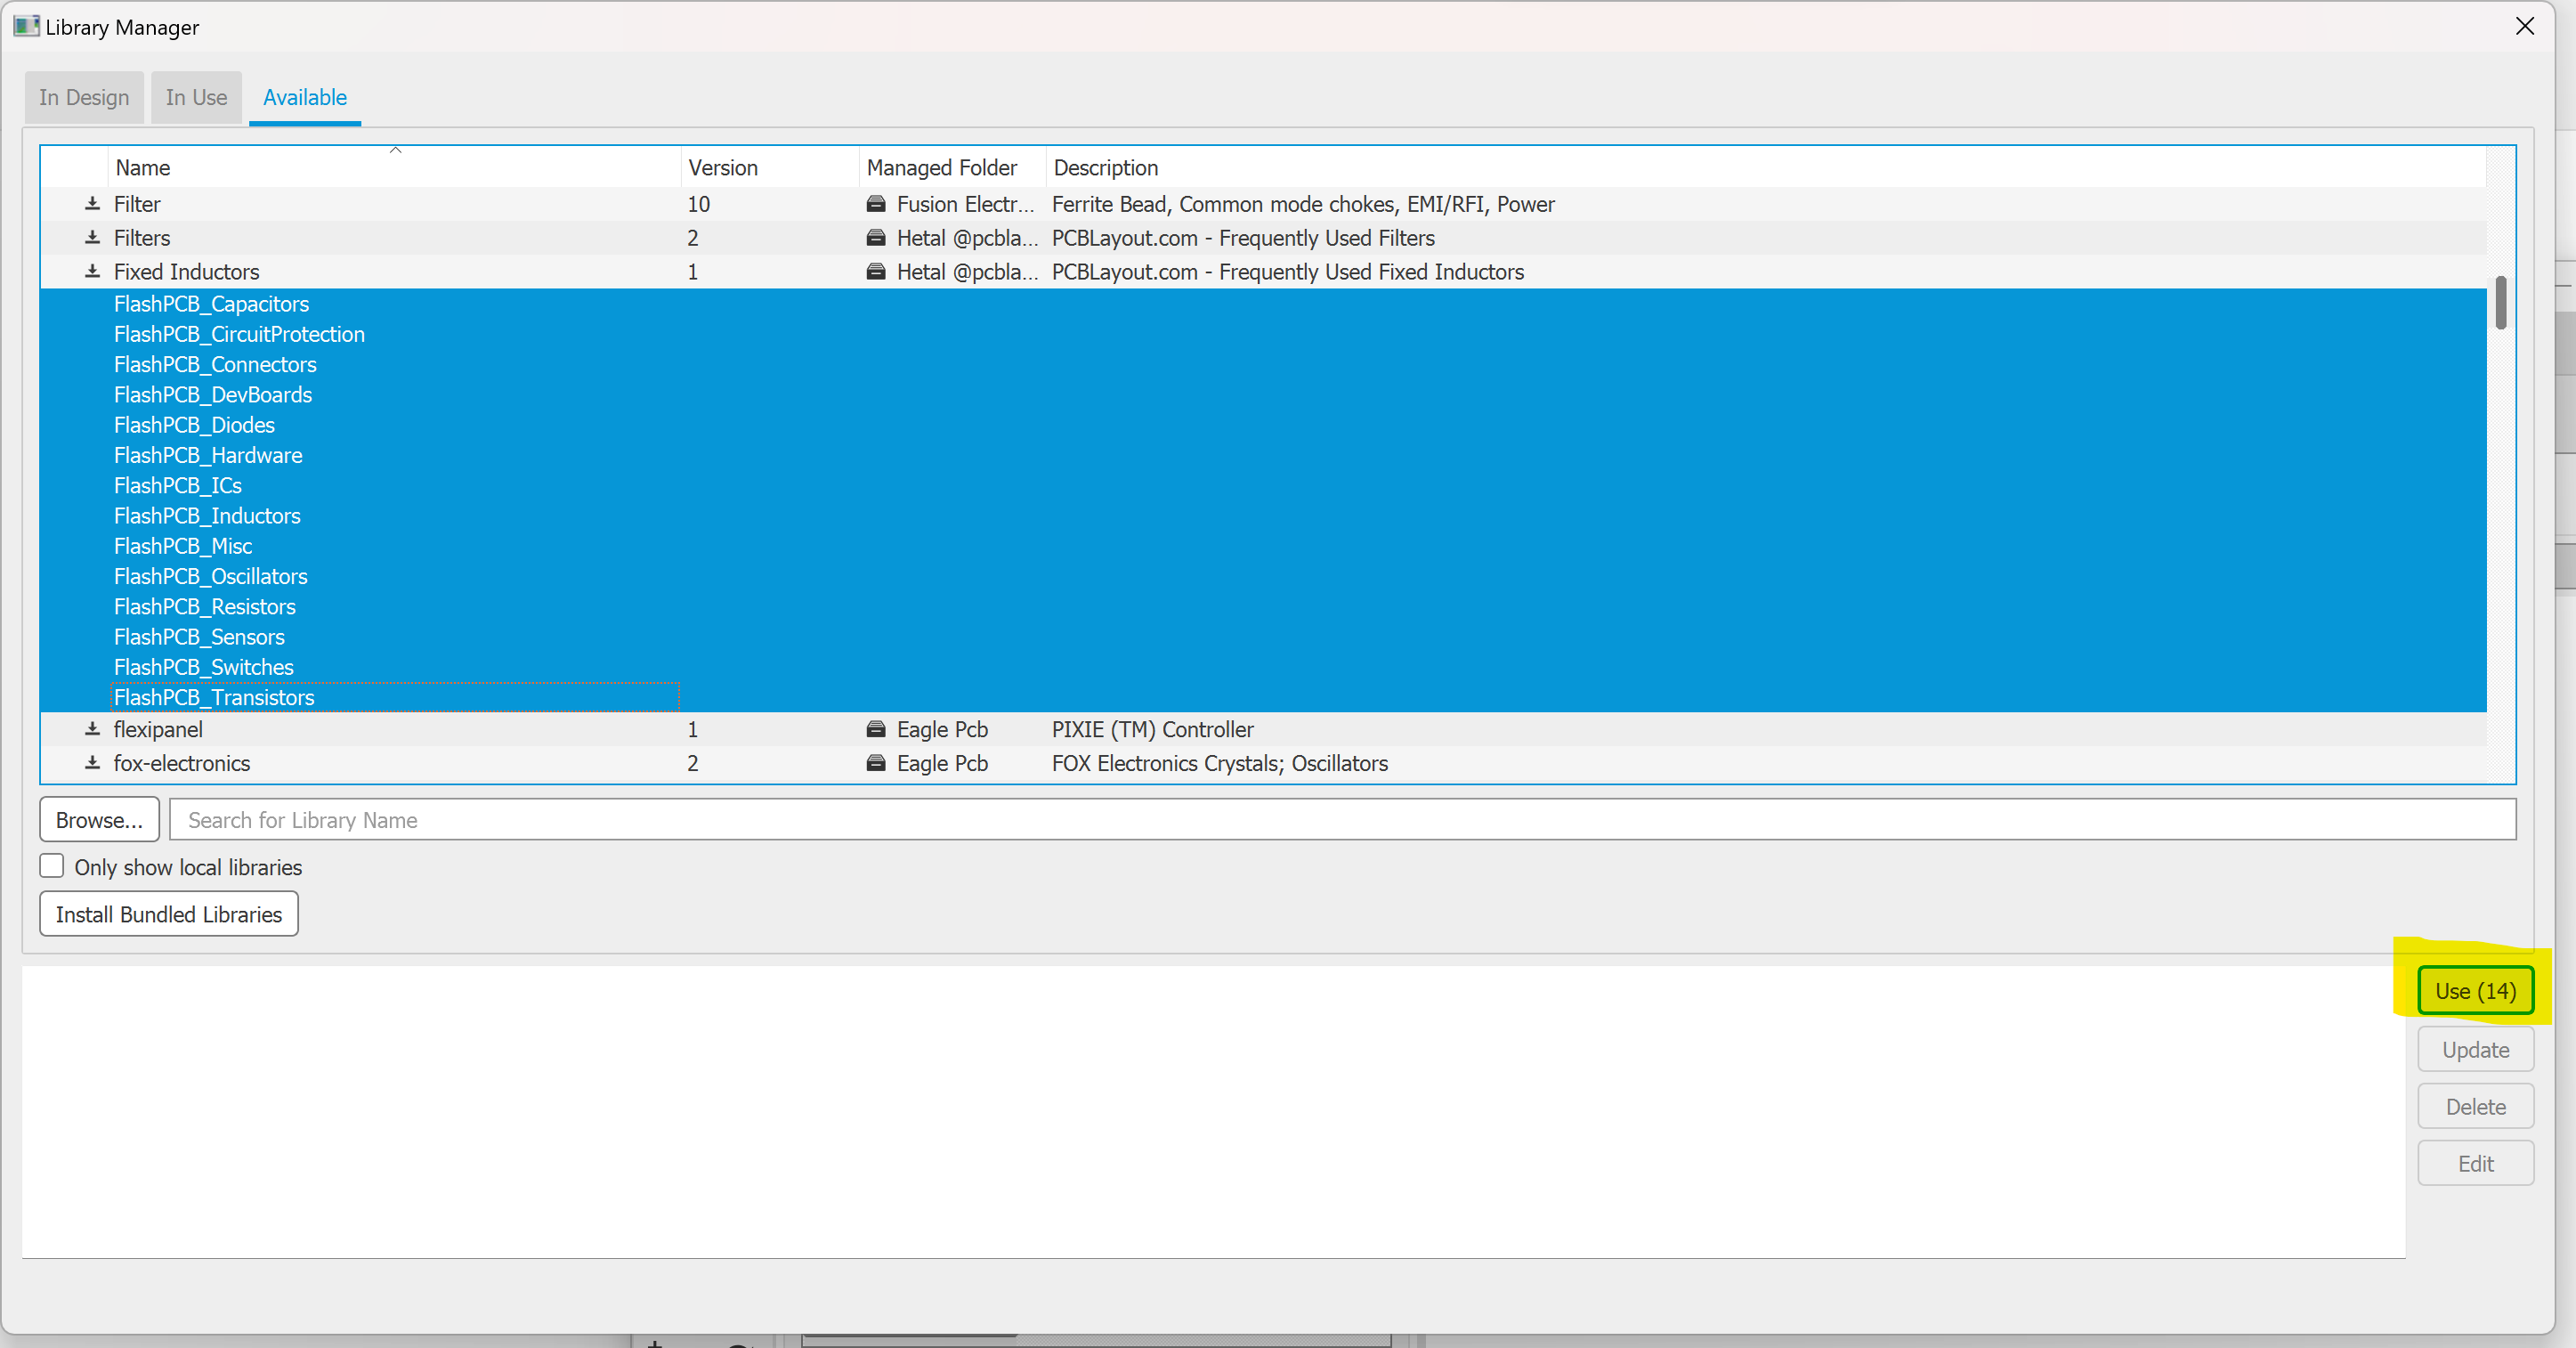
- In the Available tab select all of the FlashPCB libraries and click use.
- Save the schematic before closing Eagle or starting a new design. We have found that the changes made to the Directories or the Library Mangers don’t always persist if you do not save a file.